To use artisan shaving soap, start with a warm shower, soak your brush in hot water (you can skip this step with a synthetic brush), load the brush for 20 to 30 seconds, and lather in a bowl or on your skin using small amounts of water until the lather is glossy and dense.
-
Shaving works best right after a hot shower: Steam loosens the skin and softens stubble, giving your razor a better chance of gliding without resistance. If you cannot shower, a hot towel will do in a pinch.
-
Use a synthetic, boar, or badger brush and warm water: Use a synthetic, boar, or badger brush with warm water. Synthetic brushes perform beautifully out of the box and require no break-in. Boar brushes need a little time to soften, but reward patience with excellent backbone. Badger brushes offer a luxurious feel and excellent water retention. Warm water activates the soap without damaging any of these fibers.
-
Load the brush directly from the jar for 20 to 30 seconds: There is no need to bloom the soap. Artisan formulas are soft enough to load efficiently on contact. A damp brush and gentle swirl will do the job.
-
Lather in a bowl or directly on the area you intend to shave, slowly adding water: Start dry and add a few drops of water at a time. The ideal lather looks like yogurt. If it bubbles, you’ve added water too fast.
-
Apply in circles, shave in passes, and re-lather between each: Use light pressure and follow a three-pass system: with the grain, across, then against. This gives a close shave without tearing up your skin.
-
Store the soap properly to extend its life: Let it dry with the lid off for a few hours. Then seal it. A humid bathroom shortens shelf life, but with care, artisan soap holds up well.
If you’re ready to get it right from the first swirl, here’s how.
Why Artisan Shaving Soap Is Worth It
The right soap does more than make bubbles; it sets the tone. It’s responsible for the scent, the glide, and the way the lather builds into something thick and slick and satisfying. If that sounds over the top, try it and you will understand immediately.
This is not about throwing lavender oil into some detergent base and calling it a day. Artisan shaving soap is perfume in functional form. It tells a story – Earl Grey and bitter orange for late morning clarity or sun-warmed hay and lavender to turn your bathroom into memory.
Function matters too. And if your skin is dry, oily, sensitive, or anything in between, the right base makes a difference. Proper cushion keeps the blade from skipping and good slickness lets it glide and leaves your skin smooth and unbothered.
-
Fragrance design: Original, expressive, never a dupe. Fragrance-first, not fragrance-later.
-
Real performance: A dense lather delivers structured hydration and real protection—designed specifically for the meeting of steel and skin.
-
Ingredient integrity: Tallow, shea, saccharide isomerate. Materials chosen for what they do, not for the label.
The good ones are personal, not mass-produced in a factory that also fills shampoo bottles. Just built by hand and scent and chemistry, exactly the way they were meant to be.
What You’ll Need to Get Started
This does not require a cabinet full of equipment. A few good tools used properly will outperform any drawer stuffed with gadgets. Here is what matters and why.
-
Brush: Pick your brush based on what you feel bits you the best. Synthetics are consistent, dry fast, and work across the board. Boar brushes have more backbone and get better with time. Badger brushes tend to be more expensive, but they offer a luxurious feel and excellent water retention—many people swear by them.
-
Bowl or mug: You can build lather on your skin, but a bowl helps you see what is happening. Look for something with texture on the bottom. Even a textured coffee mug will do if you are just starting.
-
Double-edge razor: Any safety razor with a fresh blade – weight matters more than brand. Let the blade do the work. Cartridge razors can be used, but they are not ideal with proper lather.
-
Artisan shaving soap: Look for soap poured into a tub. You want something soft enough to load without pressure but firm enough to last, and if it smells like something worth remembering, even better.
-
Towel, mirror, warm water: Obvious but essential. A hot towel is your friend if you skip the shower.
The whole setup fits on the edge of a sink.

What About Pre-Shave Oils or Blooming the Soap?
Skip both.
If your soap is built properly, you will not need pre-shave oil. The lather should do the heavy lifting. If it does not, no oil is going to save the shave. Adjust your water levels and reconsider your load time to address the real issues at hand.
And blooming? No.
That advice was for hard-milled pucks, the kind you could drop on the floor without denting. Artisan soap is softer by design. You do not need to soak it or flood it to coax out lather. Simply load the brush—it’s ready to use just as it is.
Adding extra water to the surface introduces unnecessary moisture, which not only wastes product but gradually shifts the soap’s pH toward neutral. Over time, this can invite microbial growth.
Step-by-Step: How to Use Artisan Shaving Soap

This is where it all comes together. If you have never used a proper shaving soap before, this is how to do it.
Step 1 – Prep Your Skin
Shave after a hot shower – not before. The steam softens both hair and skin, making everything easier: less tugging, less irritation, and a lower chance your razor bites back. Showering beforehand is considered non-negotiable if you want a comfortable shave with great results.
If you are really pressed for time and insist on skipping the shower, you could press a warm towel onto your skin for at least two minutes.
Step 2 – Wet and Load Your Brush
Fill your sink or a bowl with warm water and let your brush soak while you set up – note synthetic bristles don’t need any presoaking.
Once the brush is saturated, shake it gently. It should be damp but not dripping. Then swirl it (no jabbing!) gently on the soap for 20 to 30 seconds.
Brush loading basics:
-
Soak warm, not hot: You are softening fibers, not boiling pasta
-
Shake out the extra: Waterlogged brushes flood the soap and kill the lather
-
Swirl patiently: 20 to 30 seconds gives you enough product for three passes and then some
Step 3 – Build Your Lather
Now comes the part people overthink. You can lather in a bowl, your palm, or right onto the area you intend to shave. All work well, but, if you are new, the bowl gives more control. You can watch the texture transform as you lather, adjusting the water as needed to dial it in just right.
Start with a dry brush and soap, then add a few drops of water—followed by a few more. Build the lather slowly and deliberately.
The right lather should be dense and glossy—think Greek yogurt. If it resembles bubble bath or dish foam, something has gone wrong. If you add too much water and it is too runny, you have two options. Either start again from scratch, or add more soap until you reach the desired consistency.
A quick note for those using our soaps. They tend to take a bit more water than most, so do not hold back. But still add it gradually and keep an eye on the texture. When it turns glossy and slick, you have hit the mark.
Step 4 – Apply and Shave
Work the lather into your beard using small circular motions with the brush. Once it is evenly spread, smooth it out with gentle strokes. You want full coverage: no clumps and no dry patches.
Use light pressure and let the razor glide; the soap should handle the heavy lifting.
Follow a two or three-pass method:
-
First with the grain
-
Then across
-
Then, if you know your skin can take it, you can go against the grain
This gets you close without scraping skin raw.
Aftercare and Storage Tips

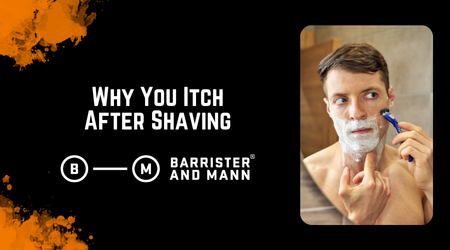
Once the razor is down, rinse yourself with cool water. This helps tighten and calm the skin. Don’t rub or scrape—just pat your face dry with a clean towel. The goal is to soothe, not sandpaper yourself..
Don’t Skip the Aftershave
A good shave inevitably takes something out of your skin; afterward, you need to put that nourishment back in.
Whether you prefer a balm or a splash, the job is the same. Soothe, hydrate, and seal the skin. A few seconds now will save you from tightness or irritation later. Which one you use comes down to personal preference and what your skin can take. If your skin tends to be oily, a splash will likely serve you better; if it leans sensitive, a balm is probably the better fit.
Dry and Store Your Soap Properly
Soap does not belong in a sealed container while still wet. After the shave, leave the lid off and allow the soap to air dry for a few hours before sealing it up again. This helps preserve the integrity of the formula and keeps the surface from going soft or sticky.
Humidity is the enemy—especially in bathrooms with poor air circulation. Dry soap lasts longer and performs better.
Rotate Soaps for Variety
You do not need to commit to one soap forever. Rotation is not only fine—it’s encouraged. Choose different scents to match your mood, and different bases to suit the seasons.
Just make sure each soap has time to dry fully before you put the lid back on. That keeps the texture stable and the surface clean.
Travel-Friendly Advice
If you are taking your shave on the road, pack smart. A screw-top tub travels well and will not leak.
Just be aware when flying with your tub in carry-on luggage. Technically, a poured soap counts as a liquid and falls under the TSA’s 3-1-1 rule. That means it must be in a container of 3.4 ounces or less and fit inside a single quart-sized clear plastic bag. It may or may not raise eyebrows at security—it all depends on who’s doing the checking. To avoid the hassle, follow the size limits and pack it properly.
From Chore to Ritual
Shaving doesn’t have to suck. It shouldn’t feel like a rushed task before work, or a hassle you put off until the stubble wins. With the right soap, the right brush, and a little technique, it becomes something else entirely. Not just a routine, but a ritual.
Good artisan shaving soap turns your sink into a small, quiet world. It smells like memory, feels like intention, and performs better than anything you've ever pulled from a pressurized can.
We build our soaps to do more than lather. They are meant to perform, to express, and to make shaving something worth doing well.
If you’re sold on the idea and ready to leave canned foam behind, we make it easy. These soaps are where most people start. They perform, they smell incredible, and they remind you why you started wet shaving in the first place.
-
Seville – Our best-selling shaving soap, affectionately dubbed “God’s barbershop,” delivers elite performance and a scent you’ll actually look forward to.
-
Bay Rum Soap – Our timeless take on the barbershop classic skips the clove overload and leans into real black strap rum, West Indie bay, sweet orange, cinnamon, and warm vanilla-like benzoin. Rich, spicy, and deeply masculine, it’s a vintage staple reimagined for modern skin.
-
Cheshire – My personal favorite. A blend of American clary sage, bergamot, and small amounts of lavender and patchouli creates a very realistic interpretation of the smell of Earl Grey tea.
-
Soap Samples – Unsure which one of our scents would work best for you? Grab a few sample bars to find your perfect match.