A safety razor gives a smoother, cheaper, more skin-friendly shave than cartridges. Use a light touch, hold the blade at a 30-degree angle, and shave with the grain. Clean the razor after use and enjoy the ritual, no bloodbath required.
-
A safety razor offers better control, cleaner lines, and fewer ingrown hairs than a cartridge: The blade cuts at skin level without tugging, which reduces inflammation and makes it especially useful for shaping facial hair or navigating difficult terrain like the chin or knee.
-
They are much more affordable over time: The upfront cost is higher, but replacement blades cost pennies. A single stainless steel razor can last decades if properly maintained.
-
They are better for sensitive skin: Cartridge razors use multiple blades that pull and scrape. Safety razors use one blade and require less pressure, making them ideal for those prone to razor burn or redness.
-
They are the environmentally responsible choice: There is no plastic waste, no disposable heads, and no chemical-filled foam. Just steel, soap, and water.
-
They don’t require brute force or blind faith: The most common beginner mistake is pressing down like you would with a cartridge.
If you are new to safety razors and perhaps a little wary of what looks like a gleaming medieval torture device, you are not alone. Most people feel that way at first. But there is no need for alarm. We are going to break this down methodically and walk you through it step by step.
Why Use a Safety Razor Instead of a Cartridge?
It is easy to understand the appeal of the cartridge razor. You buy it at the drugstore, it has a dozen blades stacked like a meat slicer, and it comes in packaging designed to look like a racecar. But the truth is that the cartridge razor is a product of convenience, not quality. It was built to be fast, not good.
By contrast, a safety razor offers a return to something more intentional. The experience slows down, but in doing so becomes more refined. The result is a cleaner shave, a lower cost over time, and far less irritation.
-
Cost-effective in the long run: The initial investment in a safety razor may be higher, but blades cost only a few cents each and last for several shaves. There is no need to purchase expensive, proprietary cartridges that lose effectiveness after a week and generate waste.
-
Gentler on sensitive skin: Cartridge razors are engineered to lift and cut hair repeatedly in a single pass, which can lead to inflammation, razor burn, and ingrown hairs. A safety razor uses one blade that cuts hair cleanly at skin level with minimal disturbance, which is especially beneficial for sensitive skin.
-
A more sustainable approach to grooming: A safety razor is a permanent tool. There is no plastic handle to throw away, no blister-packed refills, and no built-in obsolescence. Only the blades are replaced, and even those can be safely stored and recycled.
-
Greater control and precision: Because the angle and pressure are set by the user, the shave can be tailored with much more accuracy. This makes it easier to define clean beard lines, shape sideburns, or shave around contours that cartridge razors often struggle with.
It is common to feel uneasy the first time you hold a safety razor. The blade is exposed, the handle is heavy, and everything about it looks more serious. The fear of cutting oneself is understandable.
The truth, however, is that most shaving mishaps are not caused by the tool but by the technique. Beginners often bring with them habits developed through years of using cartridges. They press too hard, they rush, and they rely on force to compensate for poor blade performance.
Before You Shave: Setup, Tools, and Skin Prep
A good shave does not start with the blade. It starts before that, with tools that are well chosen and a bit of preparation that makes everything smoother, easier, and less likely to end in regret. You do not need to assemble an entire apothecary, but you will need a few essential pieces to get started.
A double-edged safety razor:
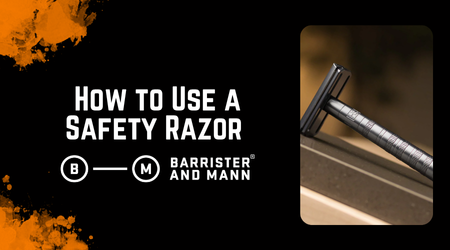
There are two basic types. Closed-comb razors are ideal for beginners because they limit blade exposure and offer more control. Open comb razors leave more of the blade exposed and are better suited to coarse hair or experienced hands. Both will get the job done, but if you are new, start with the one that is a little more forgiving.
A proper shaving soap or cream
Skip the aerosol cans. A quality shaving soap or cream gives you cushion and glide. It softens the hair and helps the blade move cleanly without dragging. Look for products that build a dense, elastic lather and include skin-replenishing ingredients.
A brush to build your lather
You will need one unless you are using a brushless cream. Synthetic brushes are often the best choice for beginners. They dry quickly, are more hygienic for travel, and require less maintenance than natural hair options.
A lather bowl or shaving mug
Not essential, but useful. A bowl helps control the consistency of your lather and keeps it from going everywhere. You can build directly on your face or in your palm if you prefer, but the bowl makes things cleaner.
Prep Your Skin the Right Way
Once your tools are in place, the preparation can begin in earnest. Start by taking a warm shower, or at the very least, applying warm water to the area you plan to shave. This does not open pores. That idea persists, but it has no physiological basis. Instead, warm water actually softens the hair and helps relax the skin, making the shave easier and less abrasive.
Build a Lather That Supports the Blade
The lather should not resemble the frothy output of an aerosol can. It needs structure. You are looking for something that is thick, creamy, and dense enough to stay put. A good shaving soap or cream should yield a consistency closer to Greek yogurt than to meringue. Whether you lather directly on your face, in your hand, or in a bowl, the goal is cushion and slickness, not volume for its own sake.
Whip the lather until it can stand on its own without collapsing. The foam should feel substantial without being stiff. Too much air will make it collapse or break down under the blade. A proper lather makes the razor glide instead of scrape and helps reduce irritation throughout the shave.
Understand How Your Hair Grows
Before the razor meets the skin, take a moment to understand how your hair grows. Shaving is far easier when you follow the natural direction of growth. This varies by person and even by zone. One sideburn may grow downward while the other angles toward the ear. The hair under your chin might spiral in two directions at once.
You can map this by gently running your fingers across your skin. One direction will feel smooth. The opposite will feel rough. That texture tells you everything you need to know about your growth pattern.
The first pass should always go with the grain. If a second pass is necessary, go across the grain. Against the grain should be the last resort, used only when you are confident in your angle, pressure, and lather.
How to Shave with a Safety Razor (Step-by-Step)
There is a rhythm to shaving with a safety razor, a progression that rewards patience and focus rather than speed or force. Every step is deliberate, and while it may feel unfamiliar at first, it is this process that makes the difference between a rushed routine and a refined ritual. The blade, after all, is not magical. It is the hand, the angle, and the intent that bring it to life.
Step 1: Set the Right Angle
The blade should meet the skin at approximately thirty degrees, an angle that allows the edge to cut efficiently while maintaining a smooth, gliding motion across the surface. Too steep, and the razor will scrape rather than slice, irritating the skin and dulling the experience. Too shallow, and the blade fails to engage properly, leaving hair behind.
A helpful way to find this position is to begin with the razor cap resting flat against the skin, then slowly tilt the handle downward until you feel the blade start to catch. That subtle moment of contact is your signal, and, once you find it, your task is simply to maintain it.
Step 2: Do Not Press
If there is one habit that causes more nicks, burns, and regrets than any other, it is the tendency to press the razor into the skin, a reflex learned from years of using cartridges that require force to compensate for dull, multi-blade construction. A safety razor works differently. Its weight is deliberate, and its edge is sharp, which means you need only to guide it, not drive it.
Short strokes of one to two inches give you control without sacrificing efficiency, allowing the blade to follow the contours of your skin rather than fight against them. After every few strokes, rinse the razor under warm water to clear away lather and stubble, as a clean blade performs better and keeps the shave consistent.
Key points to keep in mind
-
Hold the razor so the blade contacts the skin at a thirty-degree angle
-
Allow the weight of the razor to guide each stroke
-
Keep your strokes short and steady for better control
-
Rinse the blade often to maintain effectiveness
Step 3: Shave with the Grain
Your first pass should always follow the natural direction of hair growth, known as shaving with the grain, which minimizes the likelihood of irritation, razor bumps, or uneven cutting. While it may not deliver the absolute closest result on the first try, it is by far the most forgiving and sustainable approach, especially for those just beginning.
For many, one pass is enough to produce a clean, presentable shave, and adding more will not always lead to a better outcome. Shaving is not a contest of closeness, and pushing too far too early often leads to discomfort that outweighs any benefit.
Step 4: Rinse and Repeat if Needed
If additional refinement is needed, reapply your lather fully before proceeding, as even the most skilled hand should never run a razor over bare skin. A second pass should move across the grain, not against it, to reduce resistance while still removing residual stubble.
For especially coarse hair or textured growth patterns, a comfort pass, which is simply another pass with the grain, can be a useful middle ground. It offers further reduction without the aggressive friction of going directly against growth.
Only once your technique feels reliable and your skin responds well should you attempt an against-the-grain pass. Even then, take it slowly, and know that comfort, not closeness, is the more worthwhile goal.
Post-Shave Recovery: The Real Secret to Happy Skin
A good shave does not end when the blade leaves the skin. What follows afterward matters just as much, if not more, especially if your goal is not only to look clean but to feel comfortable. Post-shave care is often treated as optional, something to be skipped or forgotten, but this is where the skin tells you how well you did. If you take care of it now, it will return the favor later.
Rinse Cold, Pat Dry
Once the shave is complete, rinse the area with cool water. Doing so soothes the skin, rinses away residual lather, and provides a clean surface for whatever comes next. The cool temperature helps reduce any redness or heat that might have built up, especially in areas where the blade worked more closely.
Do not rub your skin dry. Use a clean towel and pat gently. At this stage, the skin is vulnerable, and friction is not your friend. A soft touch makes a noticeable difference.
Balm or Splash?
What you apply after the rinse depends on your skin type, your preferences, and how aggressive the shave was. Both splashes and balms have their uses, and each brings something different to the table.
Aftershave splash
Ideal for those who prefer a brisk, refreshing finish, splashes often contain alcohol or antiseptic agents that help disinfect small nicks and cool the skin. They evaporate quickly and can provide an immediate sense of clarity, but unless they are well formulated, they may not offer much in the way of long-term moisture.
Aftershave balm
A better option for anyone with sensitive, dry, or reactive skin, balms deliver hydration and restore the skin’s barrier. Look for formulas that include ingredients like allantoin, oat protein, or saccharide isomerate, which help calm irritation, support healing, and keep moisture where it belongs.
Some prefer to use both, starting with a splash for its cleansing and astringent qualities, followed by a balm to lock in comfort and protect the skin as it recovers. There is no single right way to do it, only the version that leaves your skin feeling balanced and your shave fully complete.
How to Clean and Store Your Safety Razor
A well-maintained razor performs better, lasts longer, and gives fewer surprises. You do not need to treat it like museum glass, but it deserves more than a quick rinse and a place on the edge of the sink. Clean tools make clean work, and safety razors are no exception.
Key care guidelines
After each shave, rinse the razor thoroughly under warm water. This removes lather, hair, and any residue that might linger between the blade and the cap. Do not forget the underside. Lather often collects where you cannot see it, and it hardens if left to dry.
Dry the razor with a clean towel or let it air dry somewhere away from standing water. If your bathroom tends to stay humid, placing the razor in a drawer or cabinet can help prevent long-term corrosion. The goal is to keep it dry between uses, not sterilized.
Once a week, take the razor apart and give it a proper cleaning. You do not need fancy solvents. Warm water, mild soap, and a soft brush will do the job. If there is any visible buildup, especially near the threads or blade seats, that is where to focus.
Used blades should never be tossed loose into the trash. It is unsafe for you and for anyone else handling the waste. A ceramic blade bank is a reliable option, offering a safe and discreet way to store spent blades until disposal. You can also repurpose a small tin or jar with a secure lid. Once full, the container can be recycled or appropriately discarded without risk.
Taking five minutes to care for your razor extends its life and improves every shave. Like any well-made tool, it rewards consistency with reliability.
Shave Like You Mean It
You now have the tools, the steps, and the mindset required for a world-class shave. You know how to choose the right angle, how to avoid pressure, how to build a lather that actually does something useful. You know what it takes to get a smooth result without irritation, and you understand why post-shave care is not optional.
This is not just about removing hair. It is about control, about skill, about leaving behind habits that never really worked and learning something that does. You are not just shaving. You are leveling up.
What to take with you
-
A safety razor offers control, comfort, and cost-efficiency
-
Preparation matters as much as technique
-
Clean tools perform better and last longer
Now, to get the most out of your safety razor, you will need more than just water and a willing face. A quality shave begins with a proper lather, and for that, nothing outperforms a well-made, artisanal shaving soap. The right soap cushions the blade, softens the hair, and turns a utilitarian task into something closer to a ritual.
Here are a few top picks you may enjoy. Each has been developed with performance, scent, and skin conditioning in mind.
-
Seville – Our best-selling shaving soap, affectionately dubbed “God’s barbershop,” delivers elite performance and a scent you’ll actually look forward to.
-
Cheshire – My personal favorite. A blend of American clary sage, bergamot, and small amounts of lavender and patchouli creates a very realistic interpretation of the smell of Earl Grey tea.
-
Waves – Another of our best-sellers, Waves is crisp, clean, and endlessly wearable. A fresh blend of sea notes, lavender, geranium, and bergamot, it feels like salt air on warm skin and pairs effortlessly with whatever the day throws at you.


