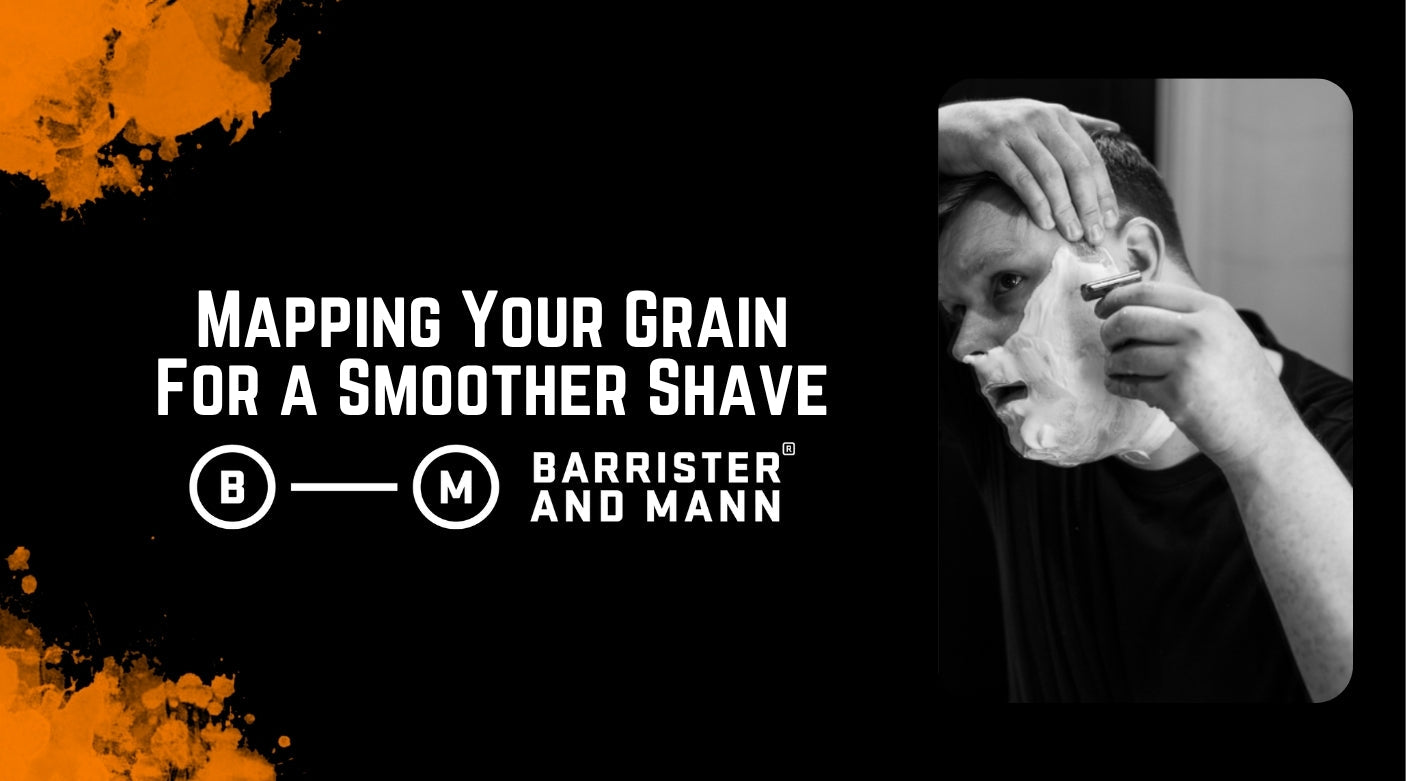
Shave mapping means learning the direction your hair grows in each zone of your body so you can shave with or across the grain, reducing irritation, bumps, and ingrowns no matter what tool you use.
-
Grain mapping reduces irritation, ingrowns, and razor burn: Knowing your grain direction means shaving with the structure of your skin and hair—not against it.
-
Hair does not grow in one direction across the body: Hair doesn’t grow in one neat direction. Your cheek might point down, your jaw sideways, your neck in a swirl. Legs, underarms, chest, and pubic areas each follow their own logic. Shave without knowing that, and you're driving blind.
-
Mapping allows for strategic passes—not guesswork: The goal is gradual reduction, not a single heroic swipe. Mapping guides you: with the grain first, across next, against only if your skin allows.
-
It works for everyone: Even if you're using a cartridge razor in the shower or trimming with clippers, understanding your grain helps you get closer with fewer side effects. Mapping is universal. What you do with it is up to you.
Below, we’ll walk through how to do it the right way.
What Is Shave Mapping and Why Should You Care?

Shave mapping is exactly what it sounds like. You are learning the lay of the land. Hair tends to grow in patterns that vary widely from person to person. While some of these patterns follow a logical direction, most do not, and they often require close attention to shave effectively and comfortably.
Mapping your grain means figuring out which direction your hair grows in each zone of your body so you can shave with it, not against it. That distinction changes everything.
Grain isn’t a theory; it’s a reality of skin and biology. Hair grows out of follicles at angles – those angles define your “grain,” and they vary wildly from one area to the next. You cannot guess them, nor can you assume them. You learn them by paying attention.
Once you understand your hair’s growth patterns, the irritation no longer feels random or mysterious. The bumps stop showing up without warning, and the process shifts from blindly scraping at your face to shaving with intention and precision.
Here’s how the terminology breaks down:
-
With the Grain (WTG): Shaving in the same direction that the hair grows is the gentlest approach for your skin. It should always be the direction of your first pass, setting the stage for a smoother and more comfortable shave.
-
Across the Grain (XTG): Shaving perpendicular to growth. Offers a closer cut than WTG with minimal additional risk.
-
Against the Grain (ATG): Shaving in the opposite direction of growth. Closest cut but also highest risk. Should only be attempted if your skin tolerates it.
Grain mapping is not a trick or a trend. It is one of the few truly foundational parts of a good shave. If you’ve been struggling with redness or rough texture, this is where you start.
How to Map Your Grain Anywhere on Your Body
Mapping your grain is a one-time investment that pays off forever. Do it once, do it right, and you can stop guessing. You will know exactly how to approach each part of your body with a razor, clippers, or anything else that cuts hair.
Grain mapping is not limited to the face, and the belief that it is has become outdated. Understanding the direction of hair growth applies to any area you choose to shave, and it is essential for achieving better results with less irritation.
That includes the top of your head, the sides of your neck, the backs of your thighs, and every inch in between. Hair grows differently in every zone. Sometimes it grows differently within the same square inch.
You cannot assume. You have to check.
Tools You Can Use
You do not need a microscope or a fancy gadget. Most of what you need is already in your bathroom.
-
Your fingers: Rub across short stubble in different directions. Smooth is with the grain and rough or scratchy is against.
-
Cotton ball: Lightly drag it across the surface. If it snags, that is against the grain, and if it glides, you are going with it.
-
Credit card or playing card: Drag it across dry skin. A smooth pass tells you you’re moving with the grain. If it skips or resists, you are going against it.
-
Selfie mapping: Let your hair grow out for a couple of days. Take pictures in natural light.
-
Printable mapping templates: Grab a diagram of a face or body. Use it to record arrows showing direction –visual memory beats guesswork every time.
Step-by-Step Process
-
Let the hair grow for two to three days. Longer than that, and it starts to curl and lie.
-
Divide the area into manageable zones. For the face, think cheeks, chin, neck. For legs, shin, thigh, behind the knee. Same logic for arms, chest, and groin.
-
Rub each zone in several directions. You are looking for the path of least resistance.
-
When you find the smoothest path, you have found the grain.
-
Optional but highly recommended: sketch it. You will not remember everything otherwise.
Face, Neck, and Head Mapping
The neck is one of the most unpredictable areas on the human body when it comes to hair growth. Patterns often shift halfway down, swirl in irregular directions, or grow upward rather than following the expected downward path. In some cases, the hair fans outward from the center or follows no clear pattern at all. This is not an area where you can make assumptions—careful observation is essential.
One of the most common mistakes people make is thinking everything grows down. That assumption leads to aggressive passes in the wrong direction, and it explains why so many people break out under the jawline.
Shaving against the grain on the neck without mapping first is a fast track to ingrowns. It is one of the most sensitive areas, and one of the least forgiving.
Head mapping follows similar logic. The crown, in particular, often grows in a spiral. You will not know which direction is which until you check.
Legs, Arms, and Underarms
Leg hair typically grows downward along the front, while on the back it often grows upward or angles sideways. It is important not to be misled by the appearance of symmetry. The growth pattern on your right leg may differ entirely from that of your left, so each side deserves its own careful attention.
Underarm hair forms its own distinct and often chaotic ecosystem. It commonly grows in circular patterns or irregular diagonals, making it one of the more challenging areas to shave effectively. The best approach is to mentally divide the underarm into four sections—top, bottom, front, and back—because each area is likely to have a different growth direction that requires its own technique.
Many people who deal with razor burn or bumps on their legs are skipping this essential step altogether. They are shaving without understanding the direction of hair growth, which means they are often dragging the blade against the grain without even knowing it. This lack of awareness is one of the most common causes of irritation.
Grain mapping addresses that problem directly. It clarifies an otherwise chaotic process, transforming what might feel like a guessing game into a deliberate and effective system that consistently delivers better results.

How to Shave According to the Map
Once you have your grain map, the next step is knowing how to use it. Grain mapping is not about blindly following arrows on a diagram. It is about gaining control over the shaving process. When you understand how your hair grows, every blade movement becomes intentional, leading to a more effective and comfortable shave.
The 3-Pass Method
This is the system we recommend because it works. It reduces stubble in layers and gives your skin time to adjust.
-
First pass = With the Grain (WTG): This is your foundation. It clears away the bulk of the hair while keeping risk to a minimum. There is no tugging, no unnecessary irritation—just a smooth, controlled beginning to the shave.
-
Second pass = Across the Grain (XTG): At this stage, you are refining the shave. The cut is closer, but it still works with your skin rather than against it. It delivers that smooth finish without overstepping into irritation..
-
Final pass = Against the Grain (ATG): Attempt a third pass only if your skin tolerates it well. This step represents the sharpest edge of closeness and carries a higher risk of irritation. It is not a required part of the routine, and many excellent shaves stop before this point.
Sensitive Areas Need Strategy
Your skin is not the same across every area. Some parts can handle pressure and stretching without issue, while others react immediately and negatively the moment a blade makes contact. Understanding these differences is key to adapting your technique and avoiding unnecessary irritation.
Areas like the throat, bikini line, and jawline are well known for their unpredictable hair growth and heightened sensitivity. These zones often respond poorly to against-the-grain passes. In many cases, it is better to stop after the second pass rather than push your skin beyond what it can comfortably handle.
Listen to your skin. It will tell you when enough is enough.
Adjust for Chaos Zones
Some areas of the body have hair growth patterns that defy logic. The left side of your neck might grow upward and outward, while the right side could grow downward and inward toward the center. Under the jawline, it is not uncommon for the grain to shift directions partway through. These inconsistencies require close observation and a tailored approach to avoid irritation.
You cannot treat these areas like the rest. You have to adapt.
-
J-hooking: Using a slight curve at the end of your stroke can be especially helpful when navigating tighter or more angular areas. It allows for better control and smoother contact, reducing the chance of nicks in tricky spots.
-
Buffing: Short, repeated strokes using minimal pressure can be effective for achieving a close shave, but this technique should only be used if your skin can comfortably tolerate it. Sensitivity varies, and knowing your limits is essential.
-
Half-passes: Rather than going fully against the grain, try using a shallow angle that falls between across and against. This approach is less aggressive on the skin while still delivering a close and effective shave.
These techniques are not intended for beginners. They require finesse, control, and a strong understanding of your hair’s growth patterns. Before experimenting with methods like J-hooks or buffing, it is important to master the fundamentals and build a reliable foundation.

Pro Tips From Experts and Hobbyists
Grain mapping may sound simple, and in many ways it is. But like every other part of the shaving process, it rewards close attention. Minor adjustments can lead to significant improvements, and the best results often come from just a few key habits practiced consistently and with care. Here are several that make more of a difference than you might expect.
-
Map on stubble, not full growth: Long hair tends to curl, distort, and obscure the true direction of growth, making it difficult to read the grain accurately. For a clear and honest assessment, wait two to three days after shaving and examine the hair when it is short. That is when the natural pattern becomes visible and reliable.
-
Cartridge razors are not an excuse: Fixed-angle multi-blade razors often guide the blade in a set direction, which can unintentionally force you to shave against the grain. This makes grain mapping even more important, not less, because it helps you understand and adjust for what the razor might be doing without your awareness.
-
With the grain may not impress you, but it protects you: The first pass is not meant to be the closest—that is not its purpose. It serves as the foundation for the entire shave. Without it, every pass that follows becomes an attempt at damage control rather than a step toward a smooth, comfortable finish.
-
Grain matters everywhere, not just the face: Hair on the legs, arms, underarms, chest, and pubic areas grows in patterns that are often irregular and highly individual. Mapping these zones is just as important as mapping the face—and perhaps even more so in areas that remain covered throughout the day, where friction and sweat are more common.
The Foundation of a Better Shave
Grain mapping should not be considered a niche habit or an optional extra. It is a fundamental part of effective shaving, forming the foundation for consistent, comfortable, and irritation-free results.
You do not need to be a wet shaving purist or use a straight razor to benefit from it. If you shave with anything, anywhere on your body, understanding your grain will make it better.
Grain mapping is not a complicated process—it is simply one that is often overlooked. Many people rush straight toward achieving the closest shave possible, chasing smoothness without first understanding the landscape of their hair growth. That approach often leads to irritation, red spots, and ingrown hairs, all of which could be avoided with a bit of initial attention.
Grain mapping changes the experience entirely. It transforms shaving from a routine filled with guesswork into a deliberate and predictable process—one that not only improves your results but also makes the entire ritual more enjoyable.
-
Grain mapping saves skin: No more guessing, no more rashes. Just clarity and control.
-
It works everywhere: Face, legs, underarms, chest, bikini line. If hair grows there, it has a grain.
-
It makes every razor better: You do not need high-end or expensive equipment to achieve a great shave. What truly matters are the habits you build—consistent technique, attention to detail, and an understanding of your skin and hair.
This is how you move from battling your shave to understanding it. Once you have mapped your grain, the next step is using a shaving soap that matches your technique. You need something that hydrates, cushions, and cooperates with the razor rather than resisting it. That is where we come in.
If you are in the market for high-quality artisanal shaving soaps where skincare comes first and fragrance is treated like the art form it is, these are some of our recommendations. Each one is built to support a mapped shave, elevate your routine, and make the entire experience feel like something worth repeating.
-
Cheshire – My personal favorite. A blend of American clary sage, bergamot, and small amounts of lavender and patchouli creates a very realistic interpretation of the smell of Earl Grey tea.
-
Seville – Our best-selling shaving soap, affectionately dubbed “God’s barbershop,” delivers elite performance and a scent you’ll actually look forward to.
-
Waves – A fresh, effortless blend of sea notes, lavender, geranium, and bergamot that resurrects the golden age of aquatic fragrance. Clean, stylish, and endlessly versatile, it pairs with anything and smells great on absolutely everyone.